Simon Gibbs
Film and Video Editor
Recovering the lost
Wednesday, June 10th, 2020

It’s all too common when working with digital footage, particularly large and uncompressed, that something gets damaged. When filming, steps are undertaken to avoid the loss of any recorded frame. Camera ops will do their best to handle their cameras correctly, even in difficult conditions, and DITs (Digital Image Technician) will make sure that the memory cards are correctly backed up into multiple locations – but still the unthinkable can happen.
When disaster strikes there is a wealth of software that claims to be able to recover lost footage from corrupted files, but in those desperate scenarios I’ve seen few that are able to actually do the job. The only software I dare put any weight in is called “Video Repair Tool“, but even that will often struggle to provide the needed results.
The next step is to get professionals who will charge extortinate amounts to get the file back to a working condition.
A few times I’ve used my own computer programming knowledge to create software that will bring videos back from the dead.
When working on ‘The ParaPod Movie‘ there were a few cases where files were corrupt and as there was not a DIT working on the film (apart from the last block where I stepped in!), so no one noticed until the edit.
In nearly all cases the footage was fixed easily, using common methods and don’t make for an interesting story – however there was one sequence that was just determined to not reach the edit.
Three cameras were set up in a room to record an hour of footage that no operator could be in. One camera did not record at all, one got 20 minutes of footage before ending, the stand alone audio recording failed for a large portion and all that was left was a GoPro style device. It filmed 100GBs worth of footage and then died – not completing the file.
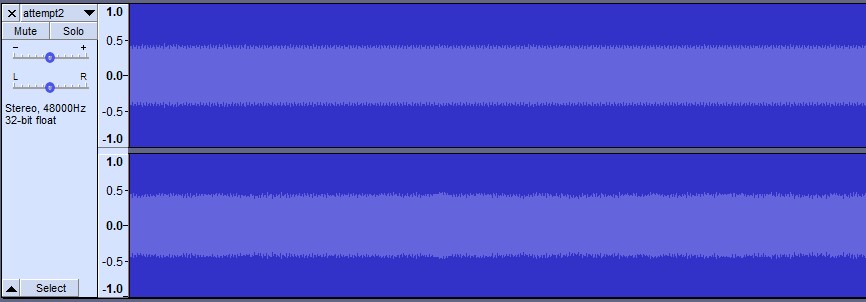
This 100GB file is what I wanted to recover, it was the only record of what happened in the room. I tried my normal collection of tools and using the pre-mentioned Video Repair Tool it pulled back the video but the audio was a garbled mess. Every conceivable option was explored but for now the sound was a wall of static which would deafen the listener as random data not designed for consumption was corrupting the audio stream.
As I felt I was part of the way there – I decided to do a deep dive and start to look at the file’s raw information and learn about how the video and sound is stored inside.
Everything on a computer is stored as a 0 or a 1 (known as binary). It is possible to view the information and change it using a program called a hex editor. I won’t go too in-depth but a hex editor displays a characters from 0 to 9 or A to F, one of 16 characters (hexadecimal) and each one represents eight bits (a 0 or a 1), known as a byte. This is the DNA of computing and as a result digital video.
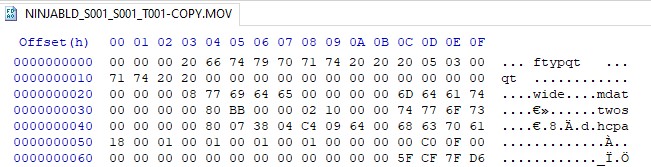
The video is in a format called PRO-RES, a professional format that is used often in video production. Online there are tech specs and guides to help you understand how these formats work. Using these, I can look at the file in a hex editor I can see where each frame starts. In this case I look for ‘icpf’ (or 69 63 70 66) and that indicates a new frame, the 4 bytes before that give me the size of the frame too.

This explains where our video is, but in this scenario I already had the video – it was the audio that was elusive. Keeping things short I knew that the audio was in blocks after so many frames – and luckily it was in an uncompressed WAV format.
If I threw away the frames and added some extra info – this file could be playable…
For a quick program or script to fix a file, there are plenty of tools you can use, but in this case I used Python. It’s quick, simple and there’s lots of support online. Great for creating a one use and done program.
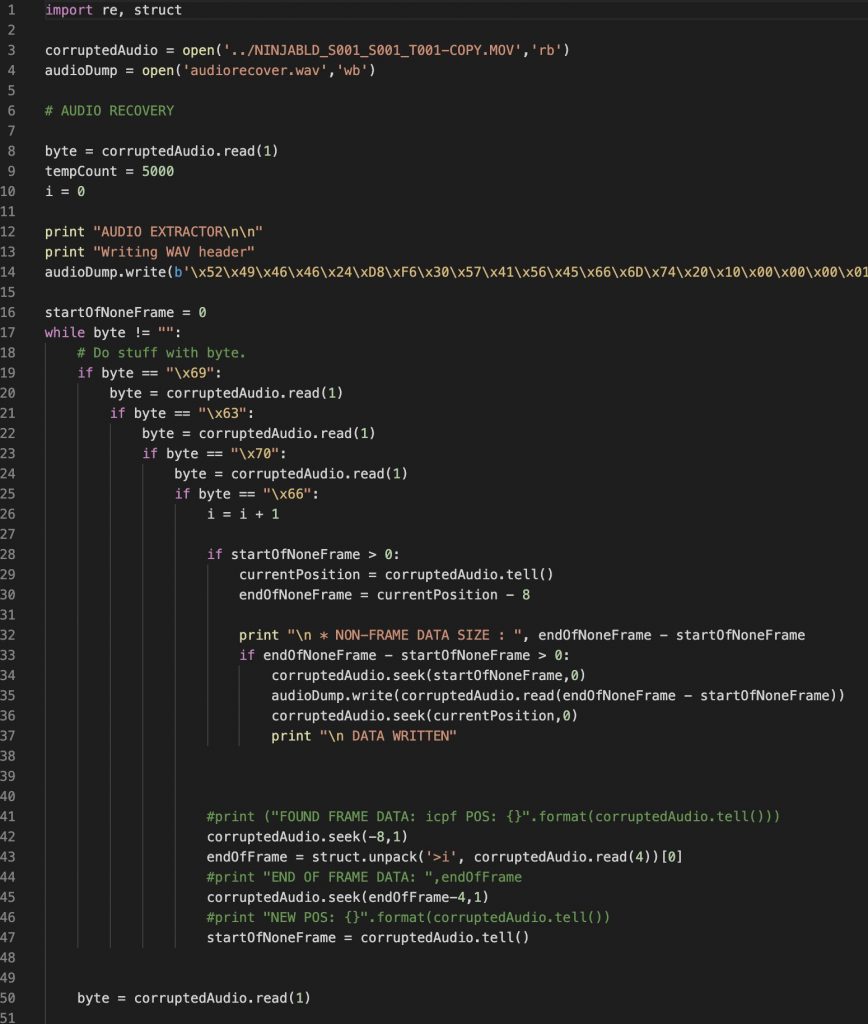
Above is an image of the script that I created. It’s quick and dirty but it does the job. The main strokes of what it does is:
- Open the video file to read in binary, and open a new blank audio file ready to receive our binary data.
- We write a bit of information to the newly created audio file to let any program accessing it in the future know what it is and how to read it.
- We then go through every byte and look for a frame. If we find one, we skip to the end of the frame. We then look for the next frame.
- If there’s a gap between the frame ending and the frame beginning, we take the information and place it into our audio file.
- We then continue until we reach the end of the file.
- A final step that is cropped from this image is that we adjust a bit on the header of the newly created WAV file to say how long the file is.
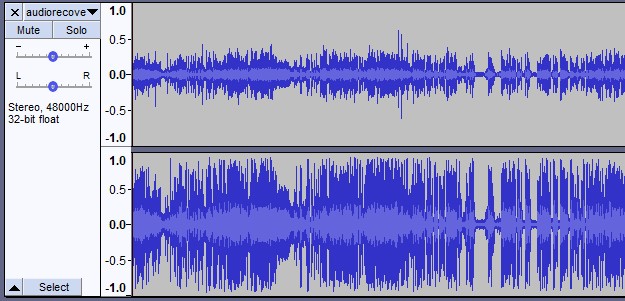
And that’s it – the program ran and out came a working audio file that I could put in the editing software and it played in-sync with the video.
I’ve had to do variations on this a few times, either recovering the video or the audio – or sometimes both. Each time I feel a sense of achievement, especially when commercial tools are failing to do the job.